We started our first vermiculture project when we were still living in The Hague. It must have been the summer of 2013. As a student in Industrial Ecology and learning all about sustainability, you start to wonder how to put sustainability into practice in your own life. So as a way of “practice what you preach” I had to figure out what to do with our food scraps.
Vermiculture or vermicomposting is a way of composting by using worms, usually you use Red Wigglers. It is very easy to start and one of the main benefits is that it doesn’t smell nor attracts flies. So basically you can do it in your living room.
There is a lot to find on the internet about vermiculture (check the bottom for some interesting links).
Here is what I did:
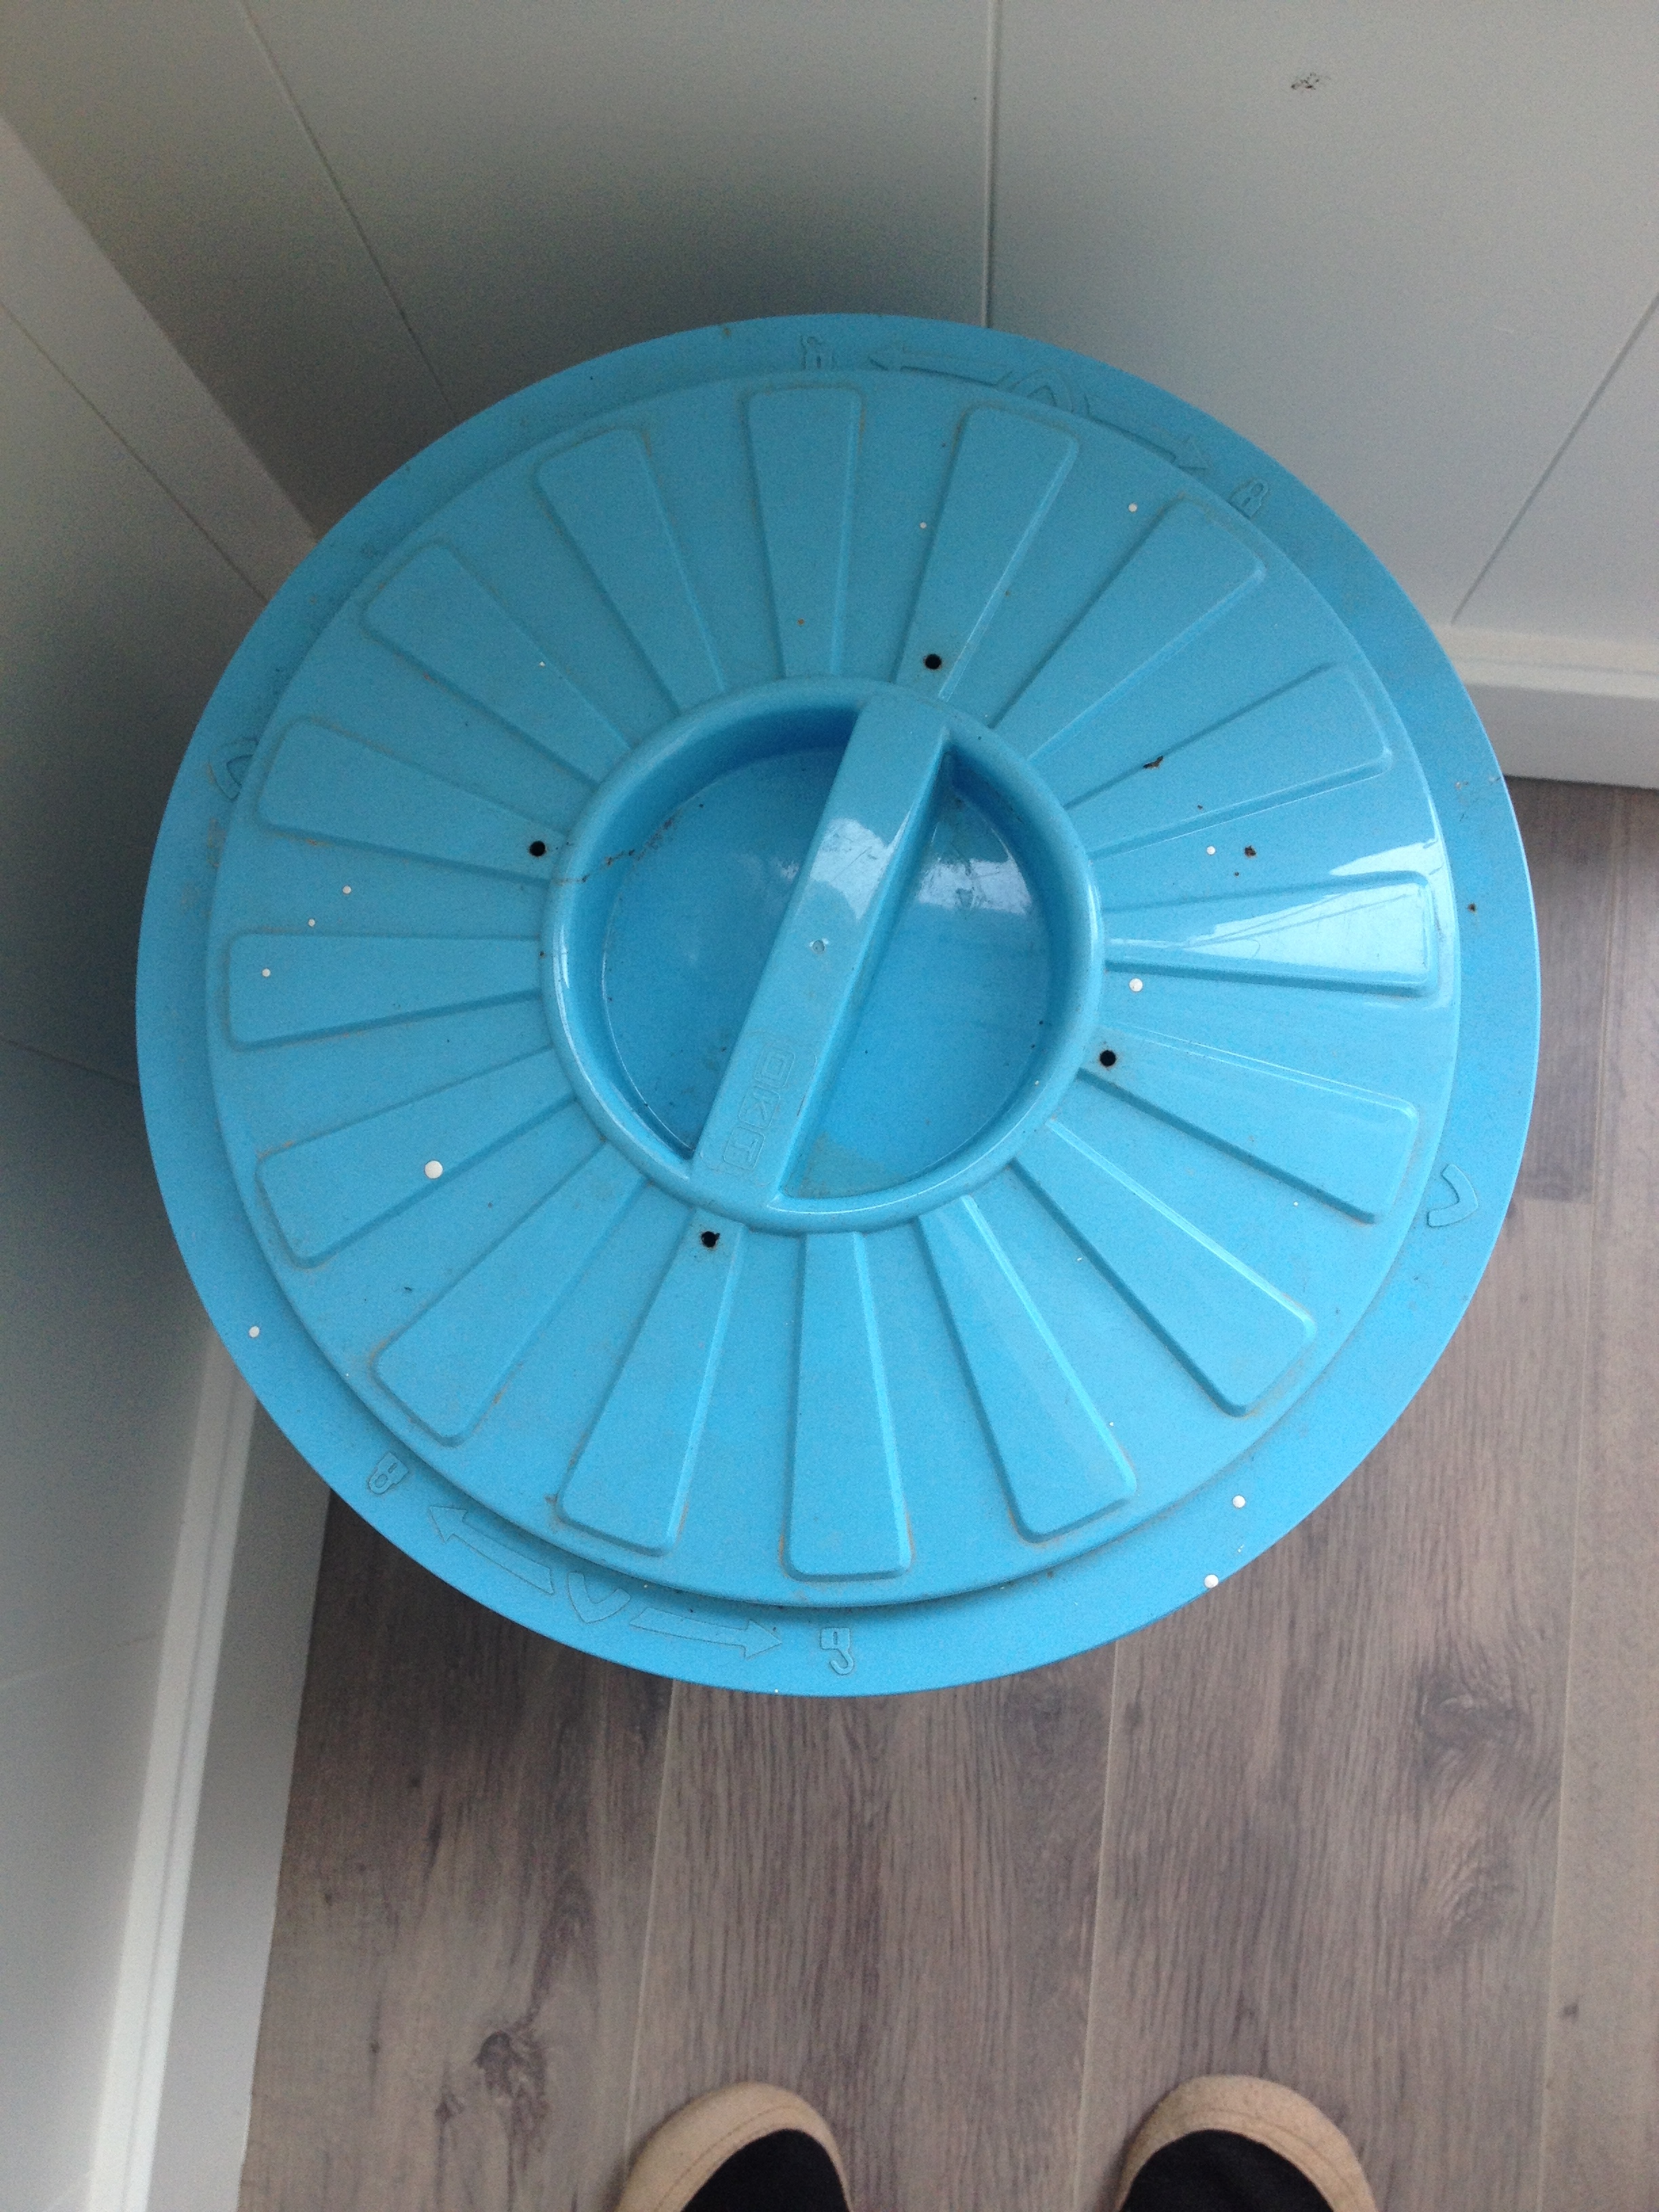
I got 2 waste bins in a do-it-your-self store. (I looked for a nice colour in an attempt to make it somewhat more appealing.) It is important that the bins have a fitting lit and that they fit in each other.
The bottom bin, I left untouched. The inner bin I made several holes. Just use a drill, but makes sure the holes or not to big so that the worms do not go through it:
- At the bottom of the bin, so that excess water can drain away. You catch/harvest this water, worm tea its called, in the bottom bin.It is a great fertiliser, just dilute it with water (about 1:20).
- On the sides of the bin, for good ventilation. Ventilation is important to provide fresh oxygen for the worms. If not you with get a anaerobic fermentation, which will smell.
- In the lit, also to have a good ventilation.
Once the bin is ready, I could start making a nice comfortable home for the worms. A comfortable home is a mixture that is not to sour nor to base. You will need the following:
- Soil (I actually used old soil from plants that I had before)
- Shredded aper (for instance newspaper, or empty toilet rolls. Avoid paper that has a coating like food packaging)
- Food scraps (in small pieces)
- Some greens, like leaves (optional)
Food scrap that you can use
- Fruits and vegetables (avoid “high acid” foods, such as citrus, onions and garlic)
- Vegetable and fruit peels and ends
- Coffee grounds and filters
- Loose tea and whole bags
- Grains such as bread, cracker and cereal (including moldy and stale, but not including anything oily, such as pizza crusts)
- Ground up eggshells (well rinsed)
- Leaves and plant clippings (avoid sprayed green with pesticides)
Avoid:
- Acid foods
- Cooked and prepared food (e.g. salads with dressing, or cooked vegetables)
- Fish, Meat and dairy products
When you start filling the bin, you make a sort of compost lasagna. Start with a layer of shredded paper, then a bit of soil, then some food and top this off with another layer of paper. You can make a couple of layers if you want, just make sure you get a good balance.
Once everything is ready, you can add your worms. I got my forms at a (sport) fishing shop. The Red Wigglers are most common used, they are red and rather big. I got the smallest box they had. You can also get some worms from a garden or from somebody else with a vermicompost.
Add a bit of water, so the picture is moist, and that’s it. I putted it inside, out of the sun. The worms like a steady temperature. Outside is also possible, but be careful in sunny places or when it is freezing outside.
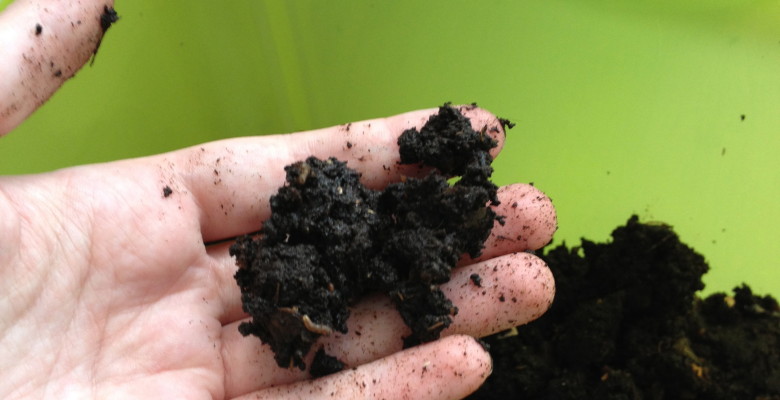
This is the result:


After about six months I harvested the compost for the first time:


Some interesting links for more tips and tricks:
https://en.wikipedia.org/wiki/Vermicompost